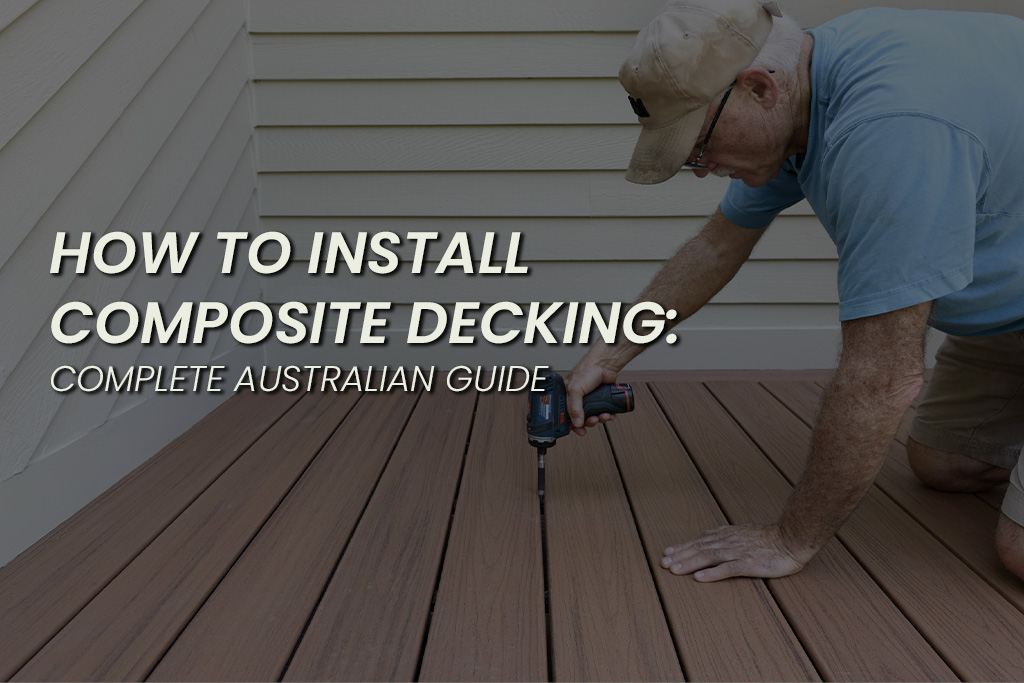
How to Install Composite Decking: Complete Australian Guide
Everything you need to know about installing composite decking — from planning and subframe construction to laying boards, hidden fasteners, and finishing touches.
Composite decking is one of the most DIY-friendly outdoor building materials available. Hidden fastening systems, consistent board dimensions, and no need for pre-drilling or countersinking make installation significantly faster and more forgiving than traditional timber decking.
Whether you’re hiring a professional installer or tackling the project yourself, understanding the installation process helps you plan effectively, avoid common mistakes, and ensure your deck performs well for decades. This guide covers every stage of composite decking installation for Australian conditions.
What Is Composite Decking? Complete Guide →
Before You Start: Planning Your Deck
Check Local Regulations
Before any construction begins, check whether your deck requires council approval. Requirements vary by state, but as a general rule you’ll need a building permit or development application for decks that are over 1 metre high from natural ground level, attached to the dwelling structure, or exceed a certain total area (varies by council).
In most states, freestanding decks under 1 metre high and under a certain size can be built without formal approval — but always confirm with your local council before starting. Building permit costs typically run $200–$800, and engineering certification (if required) adds $300–$1,000.
Design and Layout
Plan your deck layout before ordering materials. Key decisions include the deck size and shape, board direction (parallel, perpendicular, or diagonal to the house), whether you need stairs, whether the deck is freestanding or attached to the dwelling, and the entry and exit points.
A simple rectangular deck with boards running perpendicular to the house is the most cost-effective and straightforward to build. Diagonal board layouts look impressive but require closer joist spacing (400mm instead of 450mm) and generate more offcut waste. Curved or multi-level designs significantly increase complexity and cost.
Calculate Materials
Accurate material calculation prevents costly shortages and excessive waste. For decking boards, measure the total deck area in square metres and add 10% for waste (15% for diagonal layouts or complex shapes). For subframe materials, you’ll need bearers, joists, and posts — the exact quantities depend on your deck’s dimensions and the span capacity of your chosen framing material.
Calculate Materials and Costs →
Tools and Materials You’ll Need
Essential Tools
- Circular saw or mitre saw with a fine-toothed carbide blade (60+ teeth)
- Cordless drill/driver
- Tape measure, pencil, chalk line
- Spirit level (1200mm minimum)
- String line and pegs
- Speed square or combination square
- Rubber mallet
- Safety equipment: eye protection, hearing protection, dust mask
Optional but Helpful
- Board bending tool (for straightening slightly bowed boards)
- Spacer jig (ensures consistent board gaps)
- Post hole digger or auger (if building on posts)
- Laser level (for larger decks)
Materials Checklist
- Composite decking boards (measured area + 10–15% waste)
- Hidden fastening clips (manufacturer-recommended system)
- Start and finish clips
- Fascia boards (to cover exposed board ends and frame edges)
- Subframe: joists, bearers, posts (treated pine, hardwood, or steel)
- Joist protection tape (butyl tape for timber joist tops)
- Concrete footings or stirrups (if building on posts)
- Stainless steel or galvanised screws (for subframe connections)
Important: Always use the fastening system recommended by your composite decking manufacturer. Using incorrect fasteners can void your warranty and compromise the deck’s performance.
Step 1: Build the Subframe
The subframe is the structural foundation of your deck. Getting this right is critical — a quality composite deck is only as good as what’s underneath it.
Subframe Material Options
Material | Cost/m² | Lifespan | Termite Risk | Best For |
Treated Pine | $30–$45 | 15–20 years | Low (treated) | Budget residential |
Hardwood | $45–$70 | 25+ years | Low–Moderate | Quality residential |
Steel Framing | $60–$90 | 50+ years | None | Commercial / premium |
Composite Battens | $40–$60 | 25+ years | None | Over concrete |
Pro tip: If using a timber subframe, apply butyl joist protection tape to the top of every joist before laying boards. This prevents moisture from sitting on the joist surface and dramatically extends the subframe’s life — a small investment that pays for itself many times over.
Joist Spacing Requirements
Correct joist spacing is essential for composite decking performance and warranty compliance. Spacing that’s too wide causes boards to flex underfoot and can void your warranty.
Drainage and Ventilation
Proper drainage and ventilation are critical for long-term performance. The subframe should include a minimum fall of 1:100 away from any adjacent structure (that’s a 10mm drop per metre of run) to ensure water drains away rather than pooling. There should be a minimum of 50mm clearance between the underside of the decking and the ground or surface below, allowing adequate air circulation.
In humid climates or over non-porous surfaces like concrete, aim for 100mm+ clearance. Poor ventilation traps moisture under the deck, which can promote mould growth on the underside of boards and accelerate subframe deterioration.
Step 2: Lay the Composite Decking Boards
Acclimatisation
Before installation, allow composite boards to acclimatise to local conditions. Unpack the boards and spread them out on a flat surface for at least 24–48 hours (longer in extreme temperatures). This allows the boards to adjust to the ambient temperature and reduces the risk of expansion or contraction issues after installation.
Starting the First Board
Begin laying boards from the house wall or a fixed edge. Use the manufacturer’s start clips to secure the first board, maintaining a 10–15mm expansion gap between the board and any fixed structure (walls, posts, stairs). This gap allows for natural thermal expansion and contraction.
Check the first board is perfectly straight and square to your reference edge — any deviation compounds across subsequent boards. Use a string line to verify alignment across the full length of the deck.
Installing Hidden Fasteners
Hidden fastening systems are one of composite decking’s major advantages. Clips sit between boards, holding them firmly to the joist while maintaining a consistent gap (typically 3–5mm) between boards for drainage and expansion.
The process is straightforward: position a clip on the joist at the edge of the installed board, drive the screw through the clip into the joist, slide the next board into the clip, and repeat. Most hidden clip systems allow boards to be installed without any visible screws on the deck surface.
Important: Follow the manufacturer’s specific clip installation instructions. Different composite brands use different fastening systems, and using the wrong technique can affect performance and warranty coverage.
Board Gaps and Expansion
Composite decking expands and contracts with temperature changes. Proper gapping is essential to accommodate this movement without causing buckling or gaps that are too wide.
- Between boards (width): 3–5mm gap, maintained automatically by hidden clips
- Between board ends (length): 3–5mm gap where boards butt end-to-end
- From fixed structures: 10–15mm expansion gap at walls, posts, and other immovable objects
In regions with extreme temperature variation (e.g., western Sydney, inland areas with 40°C+ summers and cold winters), increase end-to-end gaps to 5–6mm to allow for greater thermal movement.
Staggering Board Joints
Where boards meet end-to-end, stagger the joints across the deck for structural integrity and a more natural appearance. Avoid aligning joints on the same joist across consecutive rows. Use a double joist (two joists side by side) at butt joints to provide adequate support for both board ends.
Step 3: Cutting Composite Decking
Composite decking cuts cleanly with standard woodworking tools, but a few tips ensure the best results.
- Use a fine-toothed carbide blade (60+ teeth for a 185mm blade) for clean cuts with minimal chipping
- Cut with the decorative face up when using a circular saw (face down for mitre saws) to ensure any minor chipping occurs on the underside
- Support the board fully during cutting to prevent flexing, which can cause uneven cuts or chipping
- Wear appropriate safety gear — composite dust is fine and should not be inhaled. Use eye protection, hearing protection, and a dust mask
For notches, curved cuts, or intricate shapes, a jigsaw with a fine-toothed blade works well. For a large volume of cuts, a mitre saw station is the most efficient setup.
Step 4: Finishing and Fascia
Proper finishing transforms your deck from a functional platform into a polished outdoor space.
Fascia Boards
Fascia boards cover the exposed ends of your decking boards and the outer edge of the subframe. Most composite decking manufacturers offer matching fascia in the same colour and finish as the deck boards. Fascia is typically fixed with colour-matched screws or adhesive, depending on the product.
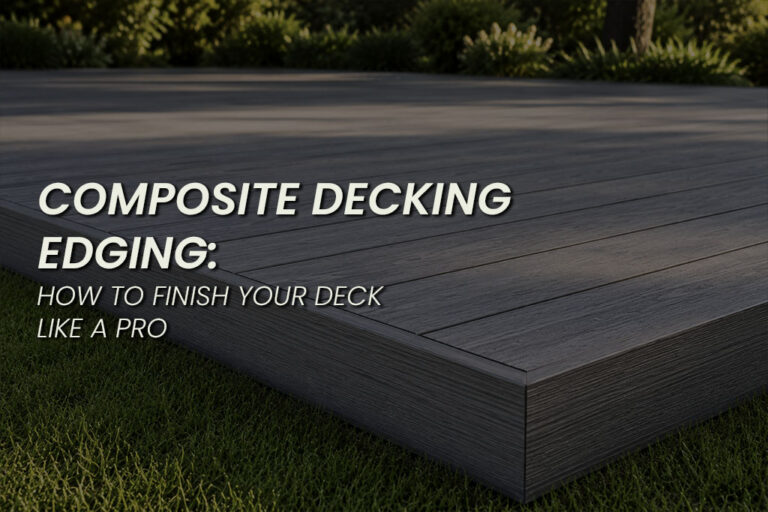
Edge Trim and Edging
For a clean, professional edge where the deck meets other surfaces (paving, garden beds, walls), edge trim profiles or L-shaped edging strips provide a neat transition. These also protect the exposed edges of composite boards from damage.
Edging Options and Installation →
Expansion Gap Cover
The expansion gap between the deck and the house wall can be covered with a flexible trim strip or a colour-matched cover profile. This keeps the gap tidy while still allowing board movement.
Final Inspection
Before considering the job complete, walk the entire deck checking for any boards that aren’t fully seated in their clips, any visible screws that should be driven flush, consistent gaps between boards, secure fascia and edging, and adequate expansion gaps at all fixed structures.
Installing Composite Decking on Stairs
Stairs are the most technical part of most deck builds. Composite decking works well on stairs, but proper planning is essential.
Stair stringers (the structural side pieces) must be spaced to support composite treads — typically at 200–300mm centres, closer than standard residential joist spacing. Each tread needs full support along its length, and a nosing detail (the front edge of each step) should overhang the riser by 20–25mm for a comfortable step profile.
Most composite brands offer dedicated stair nosing profiles that provide a clean, bullnosed front edge with integrated anti-slip features. These are strongly recommended over simply using a flat deck board as a tread, as they provide better appearance, improved safety, and proper water shedding.
Full Stair Installation Guide →
Installing Composite Decking Over Concrete

One of composite decking’s most practical applications is transforming existing concrete areas — patios, courtyards, balconies, and pool surrounds — into attractive outdoor spaces without demolishing the concrete.
The standard approach uses composite or aluminium battens fixed to the concrete surface with masonry anchors, creating a low-profile subframe (typically 30–50mm above the concrete) onto which composite boards are laid using standard hidden clips. This method requires the concrete to be structurally sound, reasonably level, and have adequate drainage away from the house.
Key considerations for over-concrete installations include maintaining proper fall for drainage (water must still flow away from structures), ensuring adequate ventilation between the concrete and the deck surface, and managing height differences at doorways and transitions to adjacent surfaces.
Floating Deck and Over-Concrete Guide →
DIY vs Professional Installation
When DIY Works Well
Composite decking is a genuinely DIY-friendly product. You’re a good candidate for DIY installation if you have basic carpentry skills and are comfortable with power tools, your deck is freestanding (not attached to the dwelling), it’s a simple rectangular design at or near ground level, and it’s under 20–25m². A confident DIYer can save $2,000–$5,000 in labour costs on a typical residential deck.
When to Hire a Professional
Professional installation is recommended when the deck is attached to your house (structural connection and weatherproofing are critical), the deck is elevated more than 600mm from the ground (structural engineering considerations), your design includes stairs, multiple levels, or complex shapes, you’re in a bushfire zone (compliance requirements), or council approval requires a licensed builder.
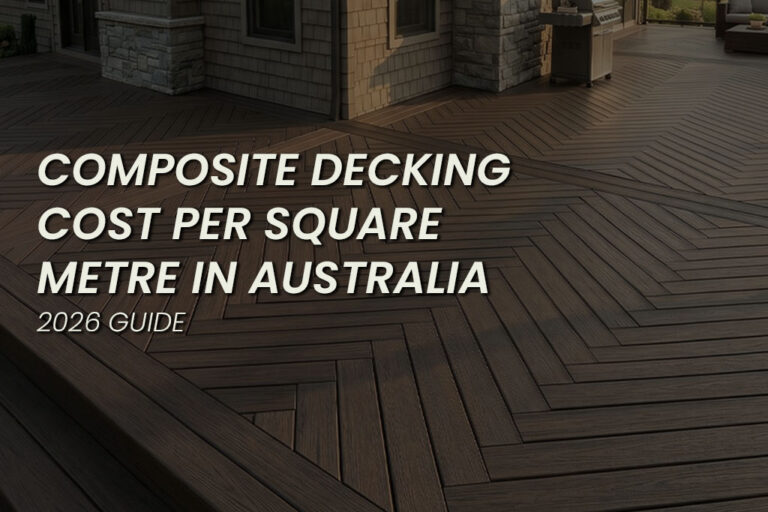
Professional installation typically costs $80–$180 per square metre for labour. Composite’s faster installation means labour costs are often lower than for timber decking, partially offsetting the higher material cost.
Find a Professional Installer Near You →
Common Installation Mistakes to Avoid
- Insufficient joist spacing — exceeding the maximum joist span causes boards to flex and bounce underfoot. Always follow the manufacturer’s specified maximum joist centres for your product.
- No expansion gaps — failing to leave adequate gaps at walls, posts, and board ends causes buckling in hot weather. Composite expands more than timber, so these gaps are non-negotiable.
- Boards not acclimatised — installing boards straight from the pallet on a cold morning means they’ll expand significantly in summer heat. Allow 24–48 hours of acclimatisation.
- Wrong fasteners — using generic screws instead of the manufacturer’s recommended hidden clip system compromises performance and typically voids the warranty.
- Poor drainage — a level or back-sloping deck traps water against the house. Always maintain a minimum 1:100 fall away from structures.
- No joist protection tape — moisture sitting on bare timber joist tops accelerates rot. Butyl tape is cheap insurance for your subframe.
- Overtightening clips — driving clip screws too tight prevents boards from moving with temperature changes, which can cause buckling or board distortion.
How Long Does Installation Take?
Deck Size | DIY (Weekend) | Professional | Notes |
Small (10–15m²) | 1–2 weekends | 1–2 days | Simple ground-level |
Medium (20–35m²) | 2–3 weekends | 2–4 days | Standard residential |
Large (40–60m²) | 3–5 weekends | 4–7 days | May need help |
Complex / multi-level | Not recommended | 5–10+ days | Hire professional |

Composite decking installs 50–70% faster than timber. There’s no pre-drilling, no countersinking, no board selection for straightness, and no grain direction management. This speed advantage is one of the reasons composite labour costs are often lower than timber, even from professional installers.
After Installation: First 30 Days
Your new composite deck may show minor colour variation in the first few weeks as the boards adjust to UV exposure. This is normal and typically settles within 4–8 weeks as the boards reach a consistent, settled colour tone. Avoid placing heavy planters, outdoor furniture, or mats on the deck during this initial period, as they can prevent even UV exposure and leave temporary colour differences.
Give the deck a light wash after installation to remove any construction dust, footprints, or debris. After the initial settling period, your deck requires nothing more than the standard cleaning routine — sweep regularly and wash with soapy water 2–4 times per year.